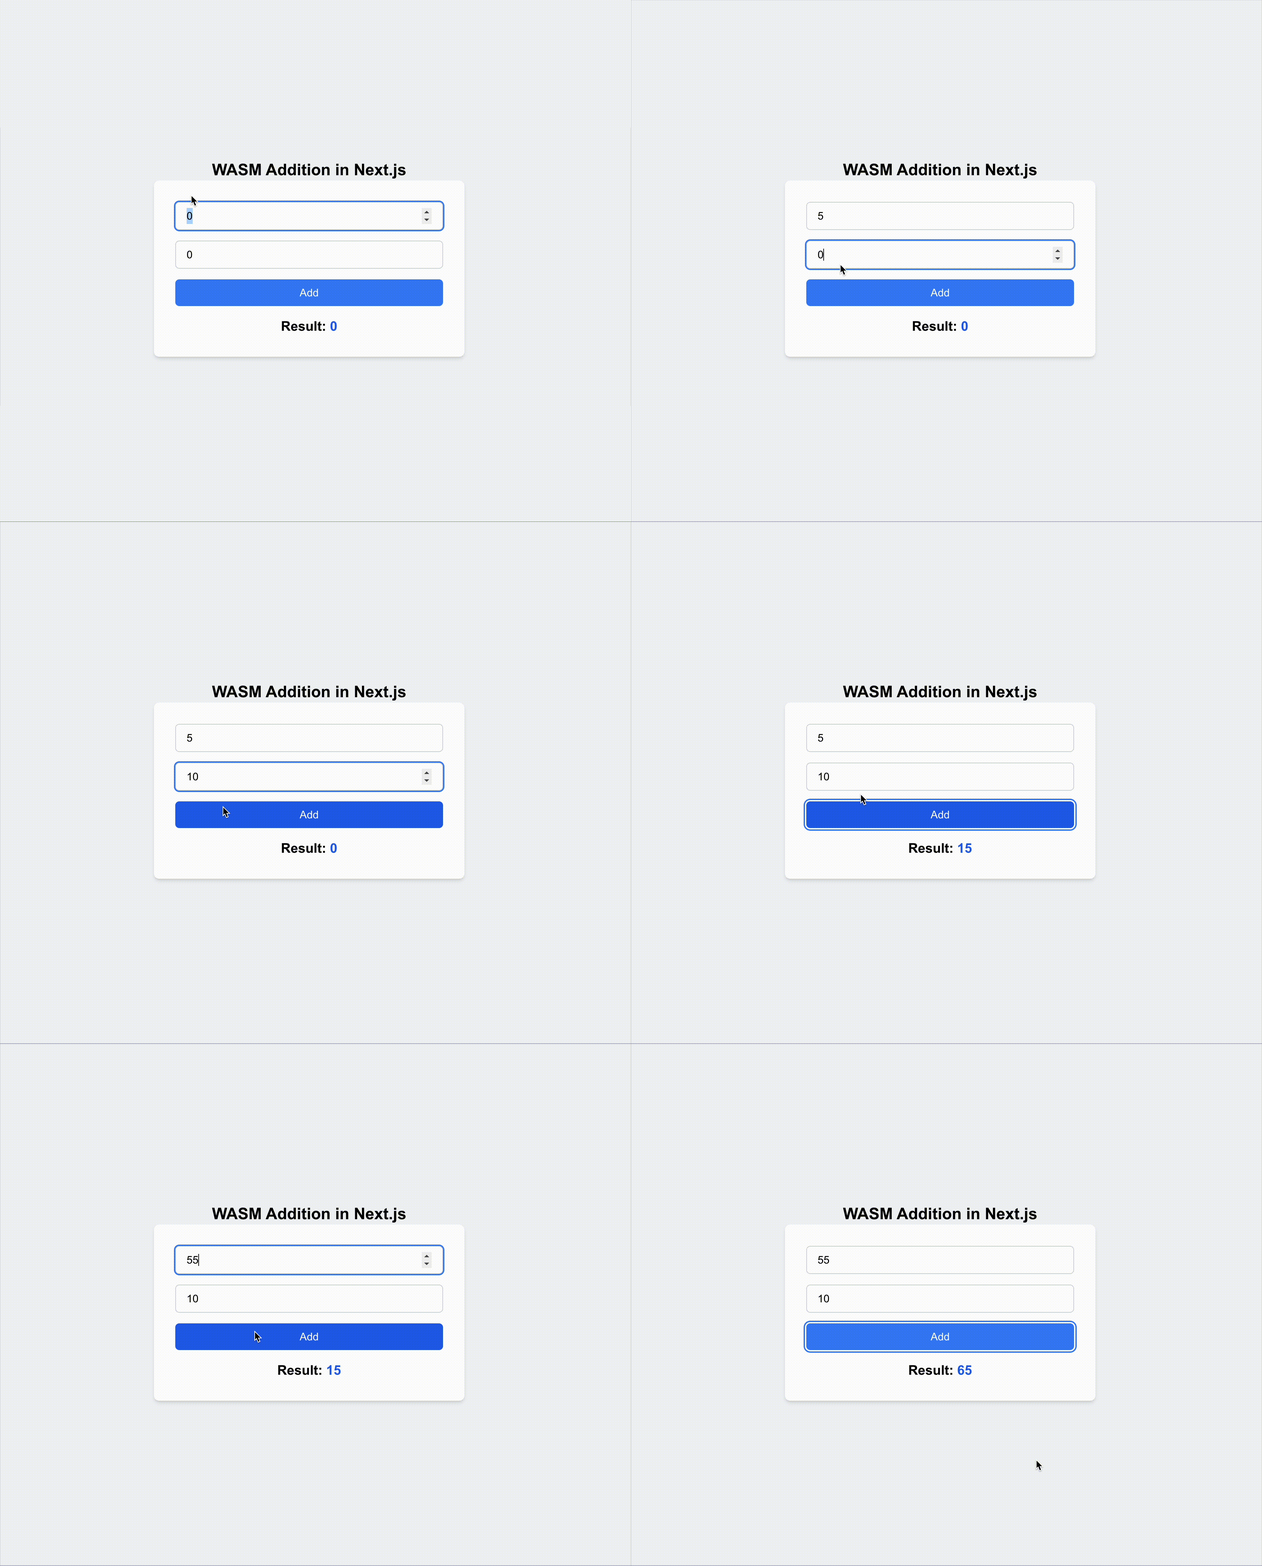
Quick Start - Running Rust code to WebAssembly (WASM) in Next.js
In comparison to several programming languages, I found Rust has the smallest size of compiled code to WASM. So I decided to write this article to help you get started with Rust code to WASM in Next.js. Running Wasm code in Next.js for every programming language has very unique implementation. So in this article, I'll show you how to run Rust code to WASM in Next.js.
Prerequisite
First of all, you need to have Rust installed with Cargo.
In order to compile Rust code to WASM, you need to install wasm-pack.
cargo install wasm-pack
Initialise a Rust project with Cargo.
cargo new --lib hello-wasm
This will create a new Rust project with a src/lib.rs file with the following directory structure:
hello-wasm/
├── Cargo.toml
├── src/
│   └── lib.rs
Then you need start Next.js project (with nodejs and npm installed) within different directory.
npx create-next-app@latest
and from src/app/page.tsx file, delete everything inside <main> tag and replace it with <h1>Hello World</h1>.
'use client'

export default function Home() {
  return <h1>Hello World</h1>
}
You can see the result of this code in the browser by running npm run dev command. Go to http://localhost:3000 in your browser. and you'll see Hello World text.
Write Simple Rust Code
write simple Rust code in src/lib.rs file.
use wasm_bindgen::prelude::*;

#[wasm_bindgen]
pub fn add(a: i32, b: i32) -> i32 {
    a + b
}
This code is a simple function that takes two integers as input and returns their sum.
Compile Rust code to WebAssembly (WASM)
Before compiling, you need to add wasm-bindgen to your Cargo.toml file.
[package]
name = "hello-wasm"
version = "0.1.0"
authors = ["Your Name <[email protected]>"]
description = "A sample project with wasm-pack"
license = "MIT/Apache-2.0"
repository = "https://github.com/yourgithubusername/hello-wasm"
edition = "2018"

[lib]
crate-type = ["cdylib"]

[dependencies]
wasm-bindgen = "0.2"
To compile Rust code to WebAssembly (WASM), in your root directory, create a build.sh file and add this code:
wasm-pack build --target web
Here is the explanation of the build script:
wasm-pack build --target web: Compile the Rust code to WebAssembly (WASM) and save it asadder.wasm.
After you have created the build.sh file, you can give permission to execute it by typing chmod +x build.sh in your terminal. Then you can run it by typing ./build.sh in your terminal.
From the build process, you'll see some files in the pkg directory with the following structure:
pkg/
├── .gitignore
├── hello_wasm.d.ts
├── hello_wasm.js
├── hello_wasm_bg.wasm
├── hello_wasm_bg.wasm.d.ts
├── package.json
Copy all these files to the src/app/ directory of your Next.js project.
cp -r pkg <YOUR NEXTJS PROJECT>/src/app/
and you can see the directory structure of your project like this:
<YOUR NEXTJS PROJECT>/
├── src/
│   └── app/
│       ├── page.tsx
│       └── pkg/
│           ├── ...
Integrating WASM in Next.js
in the src/app/page.tsx file, you can write the code below:
"use client";

import { useEffect, useState } from "react";

const WebAssembly = {
  init: null as any,
  greet: null as any,
  add: null as any,
};

interface NumberValue {
  a: number;
  b: number;
}

export default function Home() {
  const [numbers, setNumbers] = useState<NumberValue>({ a: 0, b: 0 });
  const [results, setResults] = useState(0);

  useEffect(() => {
    // dynamic imports

    async function loadWasm() {
      if (typeof window !== "undefined") {
        const { default: init, greet, add } = await import("./pkg/hello_wasm.js");
        WebAssembly.init = init;
        WebAssembly.greet = greet;
        WebAssembly.add = add;
      }
    }

    loadWasm();
  }, []);

  const handleAdd = () => {
    if (WebAssembly.add) {
      const res = WebAssembly.init().then(() => {
        return WebAssembly.add(numbers.a, numbers.b);
      })
      setResults(res);
    }
  };

  return (
  <div className="flex flex-col items-center justify-center min-h-screen bg-gray-100">
    <h1 className="text-2xl font-bold text-center text-black">WASM Addition in Next.js</h1>
    <div className="p-8 bg-white rounded-lg shadow-md">
      <div className="mb-4 space-y-4">
        <input
          type="number"
          value={numbers.a}
          onChange={(e) => setNumbers({ ...numbers, a: parseInt(e.target.value) })}
          className="w-full px-4 py-2 text-black border border-gray-300 rounded-md focus:outline-none focus:ring-2 focus:ring-blue-500"
        />
        <input
          type="number"
          value={numbers.b}
          onChange={(e) => setNumbers({ ...numbers, b: parseInt(e.target.value) })}
          className="w-full px-4 py-2 text-black border border-gray-300 rounded-md focus:outline-none focus:ring-2 focus:ring-blue-500"
        />
      </div>
      <button
        onClick={handleAdd}
        className="w-full px-4 py-2 text-white bg-blue-500 rounded-md hover:bg-blue-600 focus:outline-none focus:ring-2 focus:ring-blue-500 focus:ring-offset-2"
      >
        Add
      </button>
      <p className="mt-4 text-xl font-semibold text-center text-black">
        Result: <span className="text-blue-600">{results}</span>
      </p>
    </div>
  </div>

  );
}
repo link https://github.com/danirisdiandita/nextjs-wasm-quickstart
