Quick Start - Running C/C++ code to WebAssembly (WASM) in Next.js with Emscripten
I recently go through some tutorials about WebAssembly but I found it hard to find the right tutorial for implementing WASM in Next.js. So I decided to write this article to help you get started with WASM in Next.js.
Prerequisite
First of all you need to install Emscripten. If you haven't installed it yet. You can follow my guide of installing Emscripten and doing simple quick start with it here.
Then you need start Next.js project (with nodejs and npm installed).
npx create-next-app@latest
and from src/app/page.tsx file, delete everything inside <main> tag and replace it with <h1>Hello World</h1>.
'use client'

export default function Home() {
  return <h1>Hello World</h1>
}
You can see the result of this code in the browser by running npm run dev command. Go to http://localhost:3000 in your browser. and you'll see Hello World text.
Write C/C++ code
After you have installed Emscripten, you can start to write your C++ code with example below located in cpp/adder.cpp file:
#include <emscripten.h>

extern "C" {
    EMSCRIPTEN_KEEPALIVE
    int adder(int a, int b) {
        return a + b;
    };
}
This code is a simple function that takes two integers as input and returns their sum.
Compile C/C++ code to WebAssembly (WASM)
To compile C/C++ code to WebAssembly (WASM), you can use Emscripten sdk. in your root directory, create a build.sh file and add this code:
#!/bin/bash

MODULE_NAME=cpp/adder
OUTPUT_JS=src/wasm/adder_wasm.js

mkdir -p src/wasm

emcc ${MODULE_NAME}.cpp \
 -o ${OUTPUT_JS} \
 -s EXPORT_ES6=1 \
 -s 'EXPORT_NAME="$MODULE_NAME"' \
 -s 'ENVIRONMENT="web"'
Here is the explanation of each option:
-o ${OUTPUT_JS}: The output JavaScript file. The output file will be located insrc/wasm/adder_wasm.js.-s EXPORT_ES6=1: Export the module in ES6 format. In this way, you can use the module in JavaScript with import statement.-s 'EXPORT_NAME="$MODULE_NAME"': Export the module with the given name. In this case, the module will be exported asadder.-s 'ENVIRONMENT="web"': Set the environment to web.
After you have created the build.sh file, you can give permission to execute it by typing chmod +x build.sh in your terminal. Then you can run it by typing ./build.sh in your terminal.
within the src/wasm directory, you'll see two files: adder_wasm.js and adder_wasm.wasm. However, in order to use the .wasm file in the Next.js application, you need to move/copy the .wasm file to the public directory. You can do this by typing the script below in your terminal:
mkdir -p public
cp src/wasm/adder_wasm.wasm public/
Warning: Make sure that the public directory is in the root directory of your project.
Integrating WASM in Next.js
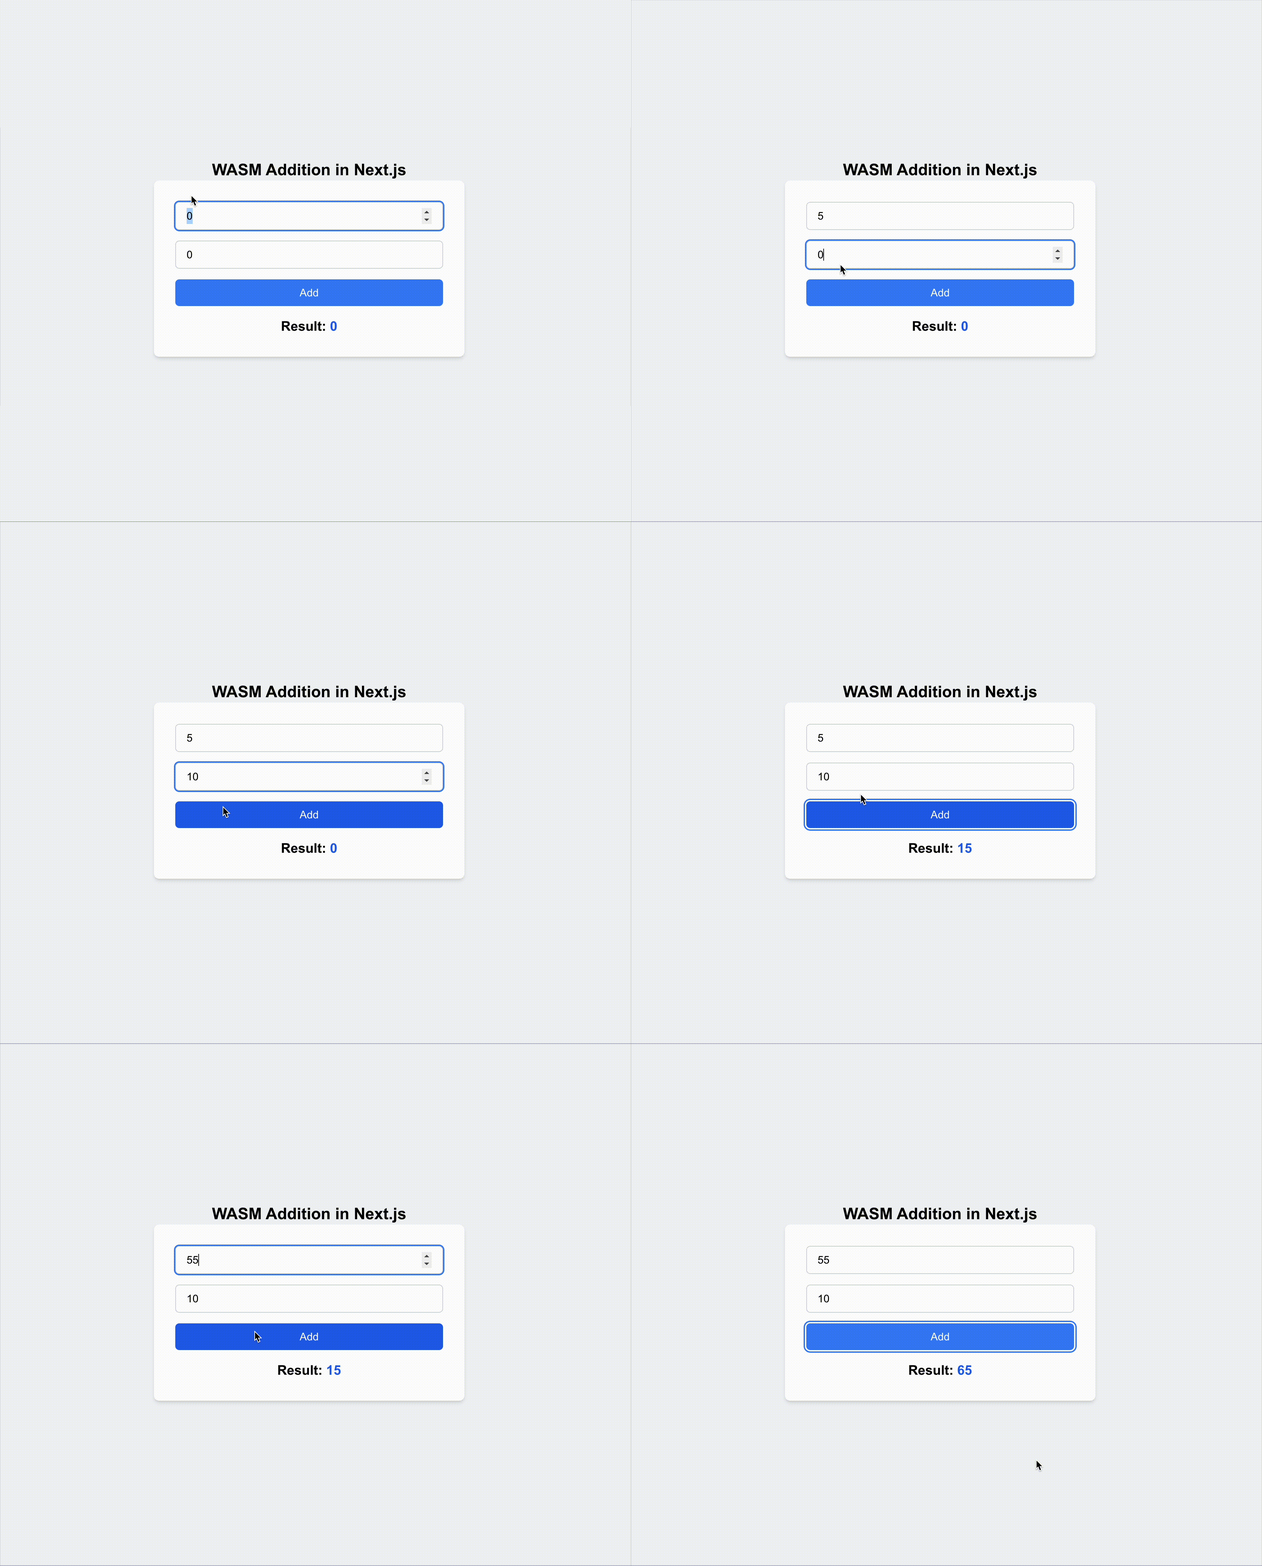
in the src/app/page.tsx file, you can write the code below:
"use client";

import { useEffect, useState } from "react";

const WebAssembly = {
  wrapper: null as any,
  binary: null as any,
  instance: null as any,
};

interface NumberValue {
  a: number;
  b: number;
}

export default function Home() {
  const [numbers, setNumbers] = useState<NumberValue>({ a: 0, b: 0 });
  const [results, setResults] = useState(0);

  useEffect(() => {
    // dynamic imports

    async function loadWasm() {
      if (typeof window !== "undefined") {
        WebAssembly.wrapper = await import("../wasm/adder_wasm.js");
        WebAssembly.binary = await fetch("/adder_wasm.wasm"); // connected to the /public folder
        WebAssembly.instance = await WebAssembly.wrapper.default({
          locateFile: () => "/adder_wasm.wasm",
        });
      }
    }

    loadWasm();
  }, []);

  const handleAdd = () => {
    if (WebAssembly.instance) {
      const res = WebAssembly.instance._adder(numbers.a, numbers.b);
      setResults(res);
    }
  };

  return (
  <div className="flex flex-col items-center justify-center min-h-screen bg-gray-100">
    <h1 className="text-2xl font-bold text-center text-black">WASM Addition in Next.js</h1>
    <div className="p-8 bg-white rounded-lg shadow-md">
      <div className="mb-4 space-y-4">
        <input
          type="number"
          value={numbers.a}
          onChange={(e) => setNumbers({ ...numbers, a: parseInt(e.target.value) })}
          className="w-full px-4 py-2 text-black border border-gray-300 rounded-md focus:outline-none focus:ring-2 focus:ring-blue-500"
        />
        <input
          type="number"
          value={numbers.b}
          onChange={(e) => setNumbers({ ...numbers, b: parseInt(e.target.value) })}
          className="w-full px-4 py-2 text-black border border-gray-300 rounded-md focus:outline-none focus:ring-2 focus:ring-blue-500"
        />
      </div>
      <button
        onClick={handleAdd}
        className="w-full px-4 py-2 text-white bg-blue-500 rounded-md hover:bg-blue-600 focus:outline-none focus:ring-2 focus:ring-blue-500 focus:ring-offset-2"
      >
        Add
      </button>
      <p className="mt-4 text-xl font-semibold text-center text-black">
        Result: <span className="text-blue-600">{results}</span>
      </p>
    </div>
  </div>
  );
}
Currently, the js file needs to be in the src directory to be imported correctly within NextJS application. However, the .wasm file needs to be in the public directory. We still have a problem here.
Update: I've found a solution to the redundancy issue mentioned earlier. and you can read the workaround in the this article here.
repo link https://github.com/danirisdiandita/nextjs-wasm-quickstart
